Push Notifications allow you to send messages, alerts, or other notifications to your users’ devices, even when your app is closed. Users don’t have to be in the app or using their devices to receive them.
With Push we can:
- Schedule Notifications to be sent at a specific time
- Automatically send notifications as users match criteria
- Attach media to notifications
- Trigger app events with background notifications
This post deals with how we can create the push notification and how we can receive push notifications on our mobile through an Ionic 2 app and the Ionic-cloud-angular lib.
IONIC 2 App with FCM (Firebase Cloud Messaging) Push Notication
FCM Setup For Android Push Notification
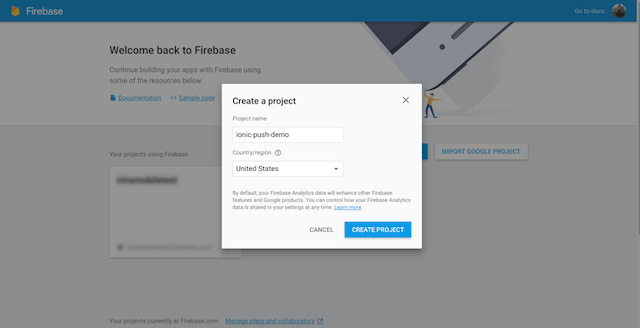
- Go to firebase console and create new project for push notification
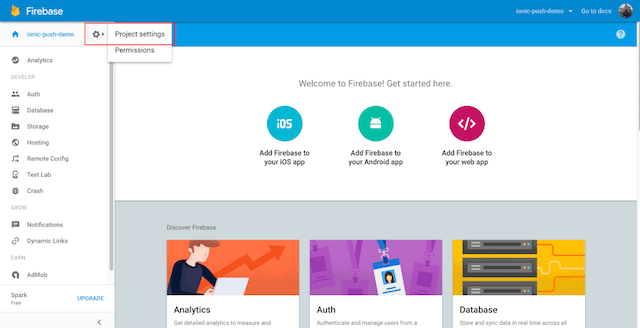
- Go to Project Settings from menu on the left
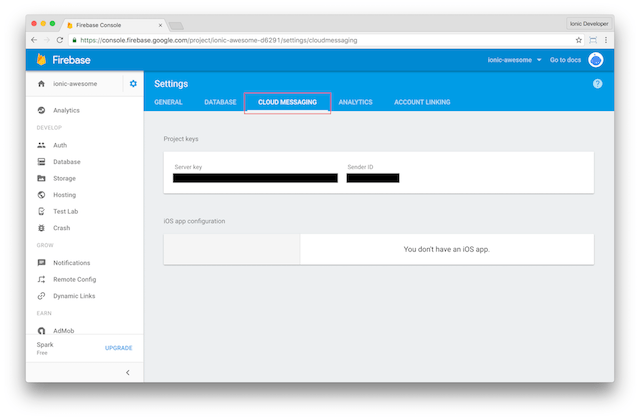
- Click on Cloud Messagingand note down the Firebase Cloud Server Key and Sender ID
IONIC 2 Cloud Project Setup with New App Creation
Now we will be creating a hybrid app in this post. So to send/receive push notifications we will be making use of the firebase cloud messaging (FCM) API.
Note: Before creating app please update the node version to latest the one.
Just create a new Ionic 2 app using the below command.
ionic start demoApp --v2
Note: Please make sure you have install Ionic and Cordova globally if not then use below command
npm install -g ionic cordova
Along with creating your project, this will also install npm modules for the application, and get Cordova set up and ready to go.
- Login to Ionic Apps
- Before you can configure your cloud settings, you’ll need to have an app ID. In your project directory, run:
ionic io init
This will automatically create an app in the Ionic App Dashboard, and set the generated App ID in your ionic.config.json file.
Note: If you’ve previously created an app on the Ionic Dashboard and you want to sync a local project, set the app ID in the ionic.config.json file.
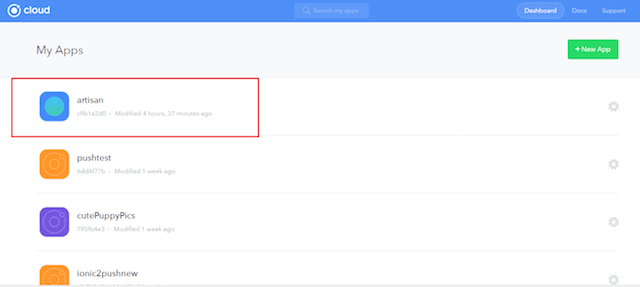
- Go to Ionic Apps and select project
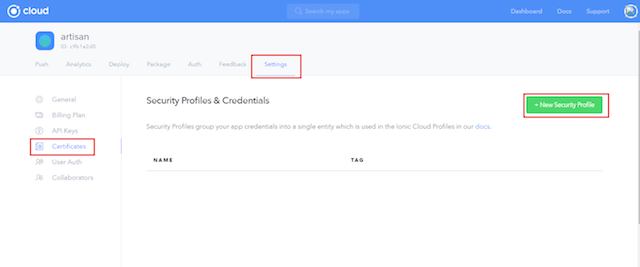
- Go to Settings tab, click on Certificates and click on New Security Profile
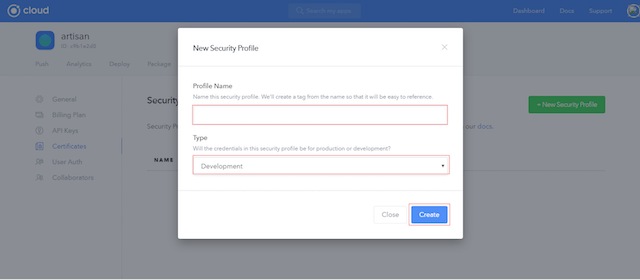
- Enter a Profile Name, select type Development and click Create
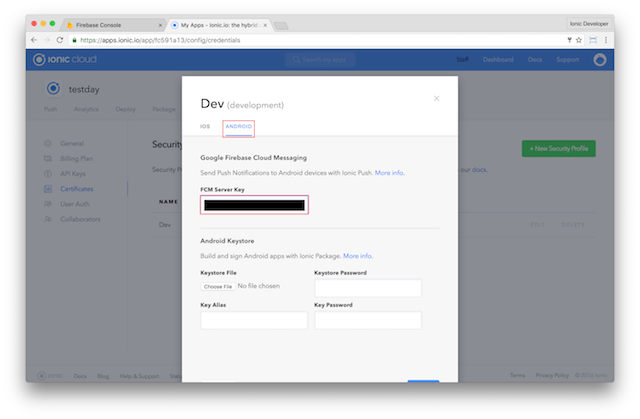
- Click 0n Edit, select Android, Enter FCM server Key and Click Save
IONIC 2 App Configuration for Push Notification
In the directory of your app, install the Ionic Cloud client:
npm install@ ionic/cloud-angular --save
We use Phonegap’s Push Plugin to receive native push notifications on iOS and Android devices. When you install the plugin, you need to supply a SENDER_ID variable, which is your FCM Sender ID (as mentioned in the above document).
cordova plugin add phonegap-plugin-push --variable SENDER_ID = 12341234 --save
In your src/app/app.module.ts file add below code:
import { CloudSettings, CloudModule } from '@ionic/cloud-angular';

   const cloudSettings: CloudSettings = {
	    'core': {
	        'app_id': 'APP_ID',
	    },
	    'push': {
	        'sender_id': 'SENDER_ID',
	        'pluginConfig': {
	            'ios': {
	                'badge': true,
	                'sound': true
	            },
	            'android': {
	                'iconColor': '#343434'
	            }
	        }
	    }
	};

	@NgModule({
	    declarations: [...],
	    imports: [
	      IonicModule.forRoot(MyApp),
	      CloudModule.forRoot(cloudSettings)
	    ],
	    bootstrap: [IonicApp],
	    entryComponents: [...],
	    providers: [...]
})
Before a device can receive push notifications, it must be registered. It’s recommended to call register() every time the app is opened so the device is always registered and ready for notifications.
To handle push notifications in your app, you need to subscribe to the notification observable.
In your src/app/app.component.ts file add below code:
  import { Component } from '@angular/core';
  import {Push, PushToken } from '@ionic/cloud-angular';

	@Component(...) export class MyPage {
	    constructor(public push: Push) {

	        this.push.register().then((t: PushToken) => {
	            return this.push.saveToken(t);
	        }).then((t: PushToken) => {
	            console.log('Token saved:', t.token);
	        });

	        this.push.rx.notification().subscribe((msg) => {
	            console.log(msg.title + ': ' + msg.text);
	        });

	    }
  }
Now add cordova-plugin-whitelist run below command
cordova plugin add cordova-plugin-whitelist
Note: For cordova version above 4.x
Run Ionic2 App
Run on physical android and iOS devices to see device token in console.
Note: Device token doesn’t generate in browser or simulator and might give exceptions which you can ignore. Exceptions like “Push plugin not find”
Follow below command to run ionic2 app:
ionic platform add android
ionic build android
ionic run android // To run on real android device
Download sample code from zCon Solutions Github Repo
Written by Dnyaneshwar Uttarwar, Software Engg. at zCon Solutions
