
Before you start
- Before starting to set up or replace the SSL / TLS certificate in mirth, you will need to understand the existing setup of mirth and important path, filenames on linux system, which get installed during the Mirth setup.
-
- The default SSL certificate path of mirth on linux system is – /opt/mirthconnect/apps/
- Another important folder is /opt/mirthconnect/conf/ which contains the mirth configuration file.
- There are two important files in mirth –
-
-
- Keystore.jks – The SSL certificate file, by default its self-signed certificate provided by mirth.
- mirth.properties – The configuration file of the mirth, which contain the path of certificate and keystore. keypass
-
-
-
- This is highly recommended to not to do on production server, unless you confirm or test it with staging or development environment.
- Please ensure that you take a backup of the important files or folders before you start replacing SSL certificate activity.
- Please ensure that you have your certificate in “.JKS” (its also called as “JCEKS” file) format.
- Portecle or keytool applications that allows to convert or import the “.JKS” keystore file.
- SFTP or FTP login of the EC-2 linux instance in order to copy the required files from the instance.
- Putty or any SSH tool to login to EC-2 linux system.
On the Primary
- First login to the EC-2 linux system using SSH or putty (As I’m on windows machine, so using putty tool) and go to – /opt/mirthconnect/apps/ -> create a backup file of keystore.jks.

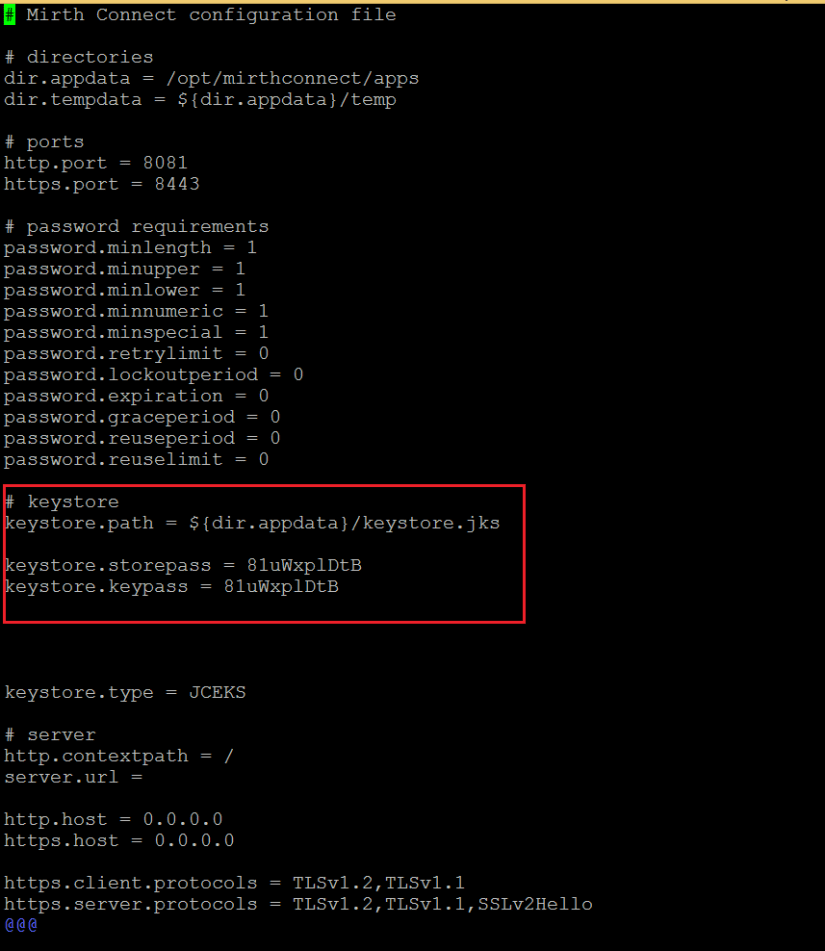
- Confirm the keystore path and keystore keypass from the /opt/mirthconnect/conf/mirth.properties file.

- The important information from the mirth.properties file i.e. keystore configuration of mirth. – (This is highly recommended to do not change or modify any in the mirth.properties file)
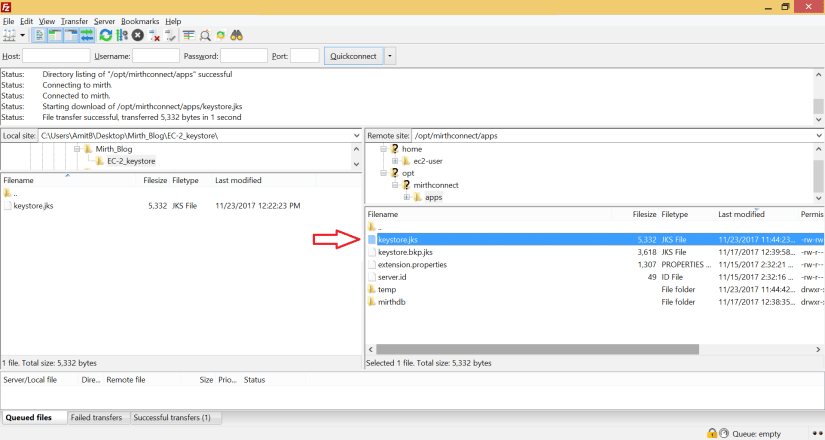
- Once the backup process is completed then the next step is to download the keystore.jks file to local server using SFTP or FTP tool.

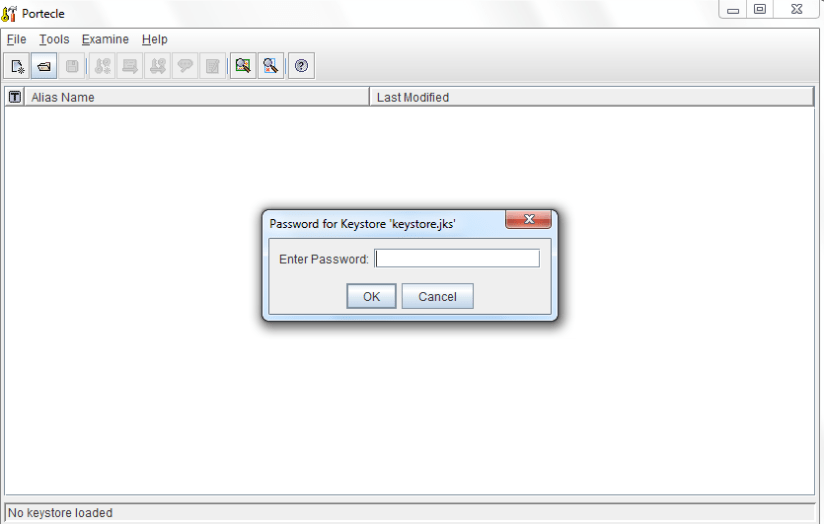
- Open Portecle tool on your local machine and navigate to folder where ‘keystore.jks’ file is present. (The file which you copied from EC-2 to local).

- Once you click on Open the next widow will open and ask you for a keyPass (Password). Enter keytStore Password from Mirth.Properties file and click on OK.
- Then you can see two files ‘encryption’ and ‘mirthconnect’. Next step is you should delete ‘mirthconnect’ file. (Which is self-signed certificate file of Mirth Connect)

- Next step is you should import your SSL certificate. Click on ‘Import Key Pair’ -> Navigate to your SSL certificate folder and select certificate file -> Click on ‘Choose’.

- Next widow will open and ask you for Password. Here you should Enter Password which you have given at the time of creating your SSL certificate.
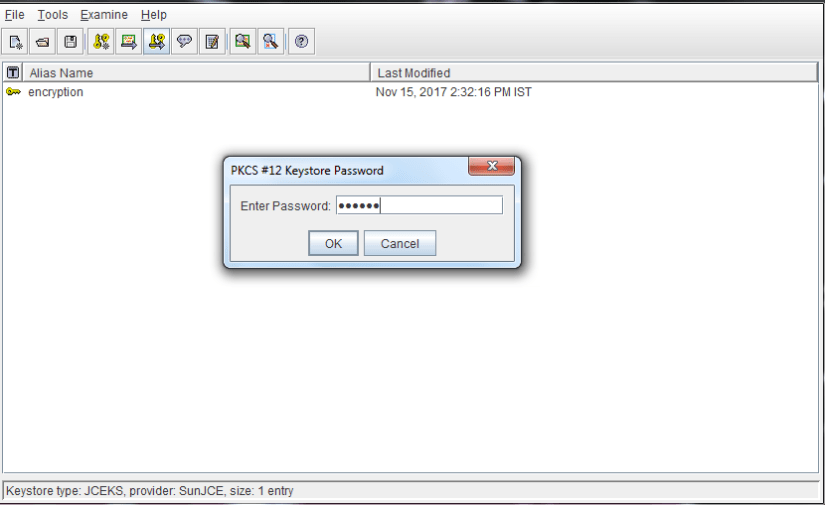
- Enter Password and Click on ‘OK’. Select Key pair -> Click on ‘OK’.

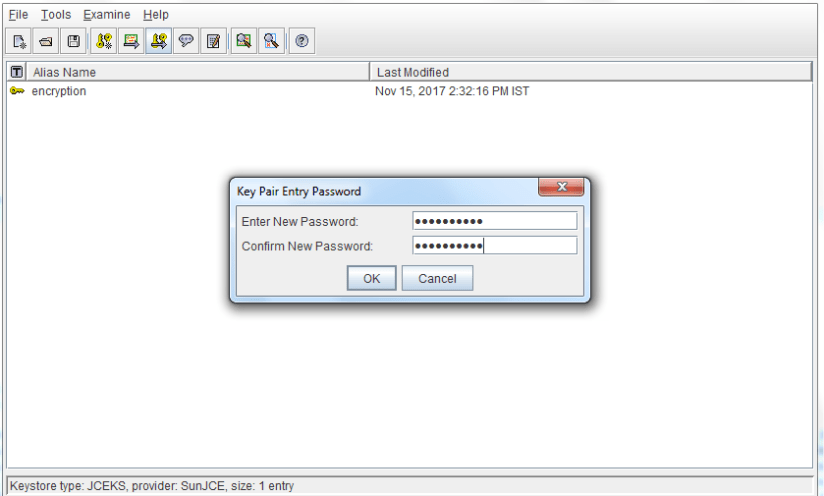
- Give Alias name as ‘mirthconnect’-> click on ‘OK’.

- It will ask for New Password. Enter default mirth keystore password. (Password from /opt/mirthconnect/conf/mirth.properties) -> Click on ‘OK’
- Successful Import Key Pair

- Save the keystore.

- After replacing the keystore file on local server, the next step is to upload / replace the keystore file to same location of mirth connect on EC-2 linux server (/opt/mirthconnect/apps) and overwrite the existing file with the new keystore file.
- Finally, restart the mirth connect services using standard commands to apply new changes of SSL certificate.

- Access your mirth connect using https and using given port for.e.g 8443.

Written by Amit Bhandari, Project Lead at zCon Solutions
